Convert MBR to GPT Without Data Loss on Windows 10 (2021)
This guide is to strictly convert MBR to GPT without any data loss. You no longer have to use Diskpart and erase the whole hard disk to convert the partition table. We will be using an official tool from Microsoft called MBR2GPT for this tutorial. It’s a command-line tool, but the process is straightforward. By the way, you can also use this method to make your Windows 10 PC compatible with Windows 11. So without further ado, let’s dive in.
Requirements
- Your PC must support UEFI to be able to convert MBR to GPT without data loss on Windows 10. If you have an older computer and the BIOS only supports Legacy mode, you can’t utilize this method.
- All Bitlocker-encrypted volumes must be suspended for the conversion to take place.
- Your PC must be running Windows 10 version 1703 or later. It’s necessary for your PC to be running the Creators Update or later because then you already have Microsoft’s MBR2GPT tool on your system. 4. Partitions cannot be more than 3.
Verification
Before we begin, you will need to verify some information. Press the “Windows + X” keyboard shortcut and open “Disk Management“.
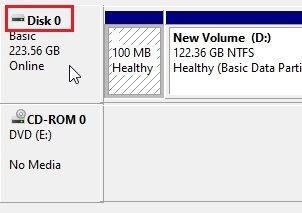
After that, check the disk number in the left corner. Generally, it’s 0. However, if you have connected multiple hard disks and want to convert a particular hard disk, make a note of the specific disk number.
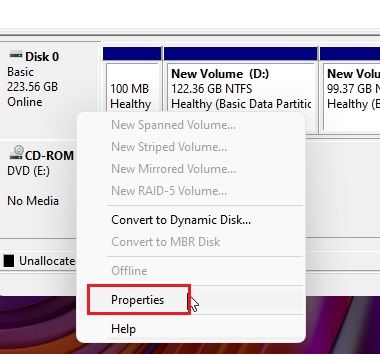
Next, right-click on “Disk 0” and open “Properties“. If you have got another disk, right-click on it and select “Properties”.
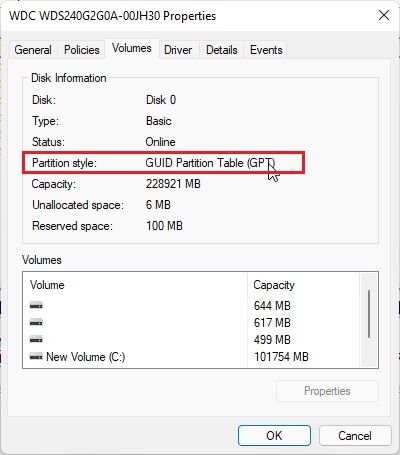
Here, switch to the “Volumes” tab and look for the “Partition style”. If it’s MBR, we indeed need to convert the MBR partition to GPT. And if it displays GPT, we don’t need to do anything.
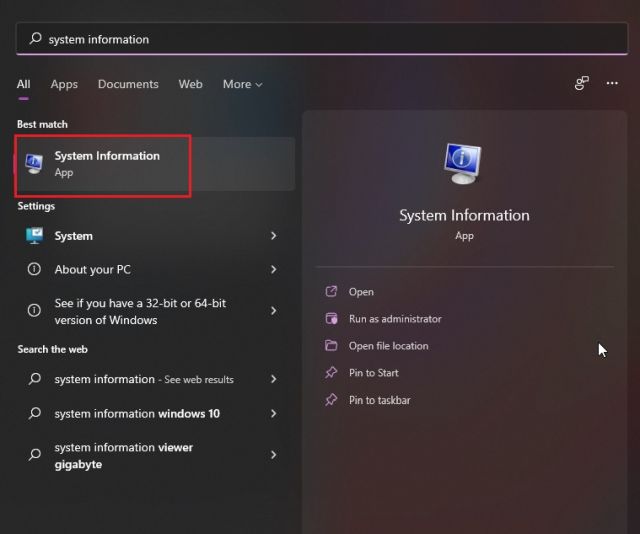
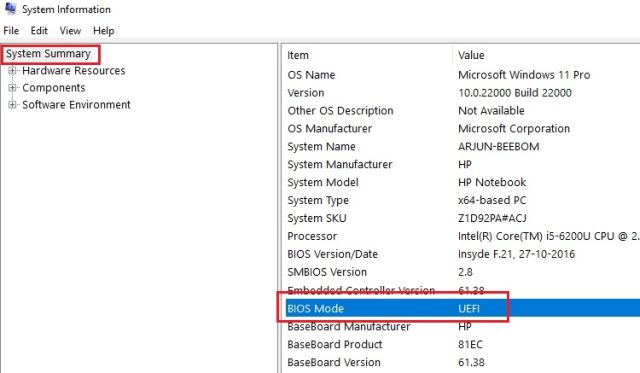
Next, press the Windows key once and search for “System information“. Open it.
Under “System Summary”, look for “BIOS Mode“. If it’s UEFI, your PC is supported, and you can go ahead with the process to convert MBR to GPT on Windows 10. In case it reads Legacy, you will have to follow this guide to change the firmware mode to UEFI. With that said, I suggest even UEFI users boot into their BIOS to find the correct UEFI menu. You will also have to perform this action after the conversion anyway. This way, you will be certain where to look for the correct settings page, post the conversion.
Change Legacy Mode to UEFI in BIOS Firmware
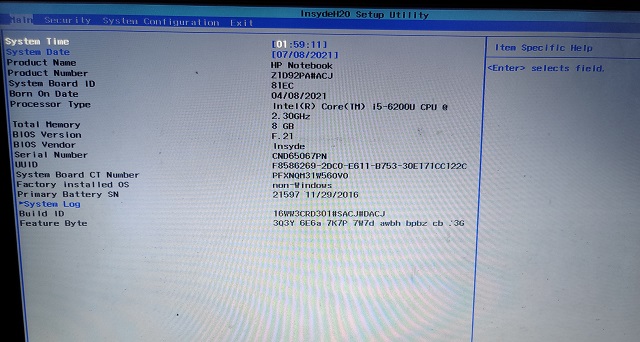
Restart your Windows 10 computer, and while the computer boots up, press the BIOS key. Every computer has a different BIOS key, and you might need to search for it on the internet. Note: For example, HP laptops generally have F10 as the BIOS key. You need to find the BIOS key for your PC from the internet. It should be one of these — F1, F2, F3, F9, F10, Esc, etc. Users who have custom-built PCs also need to find the BIOS key based on the motherboard manufacturer.
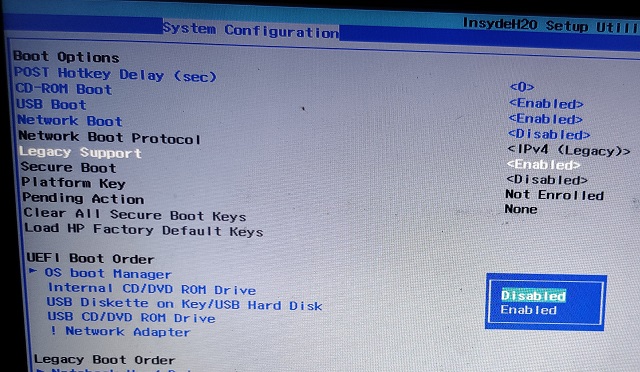
Once you are in the BIOS, move around the different menus and look for “UEFI” or “Legacy”. The option should be under “Advanced Settings”, “Boot Mode”, or “System Configuration”, depending on your OEM. On some PCs, disabling “Legacy Support” enables UEFI. Just make sure UEFI is not greyed out, and Legacy is disabled. Note: If you don’t find any mention of UEFI, sadly, you can’t convert the MBR partition to GPT on your Windows 10 PC.
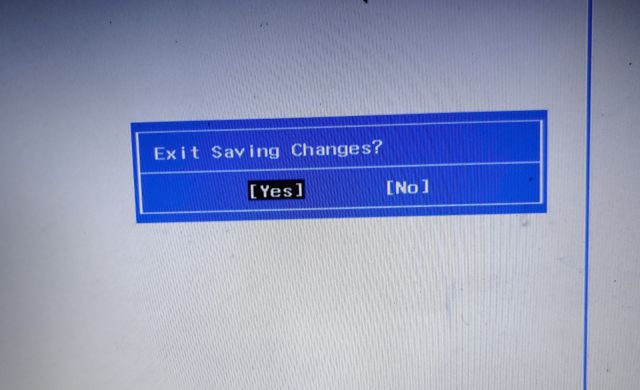
Now, press “F10” and hit enter to save and exit. F10 is generally reserved for “Save and exit”, but the key may differ for your computer. We suggest you check it right on the BIOS footnote. Your computer will now restart.
Once the computer boots up, open System Information again and check the BIOS Mode. It should be showing “UEFI”. Now, you are ready to move to the next step.
Convert MBR to GPT Without Data Loss on Windows 10
Note: Before we proceed ahead, I strongly recommend backing up all your valuable and personal files and folders. While the method is tried and tested, you never know when things can go south, especially while dealing with Windows. So go ahead and make a backup. You can learn how to create a full Windows 10 backup via the linked article.
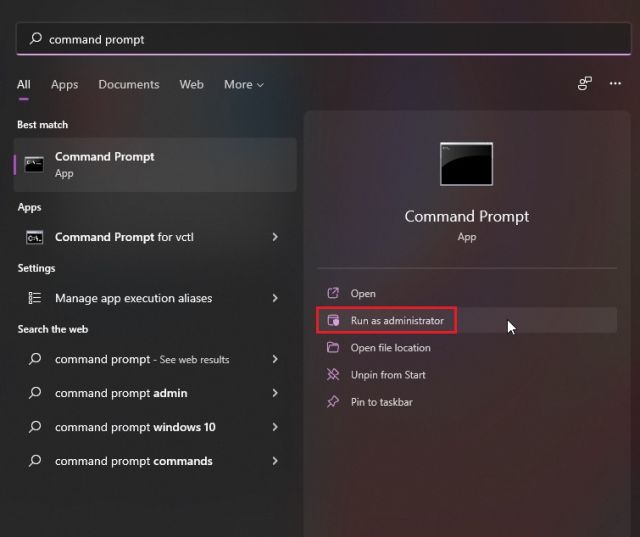
Now that you have verified all the information and backed up your data, it’s time to convert MBR to GPT without data loss on your Windows 10 PC. Press the Windows key once and type “command prompt“. From the search result, click on “Run as administrator” to open Command Prompt.
On the CMD window, paste the below command and press enter. Here, I’m assuming your disk number is 0. If it is something else, change the disk number accordingly. This command is to validate all the configurations. If you get the “Validation completed successfully” message, you can proceed ahead. If you get any error, make sure your PC is configured to the correct settings, as I have mentioned above.
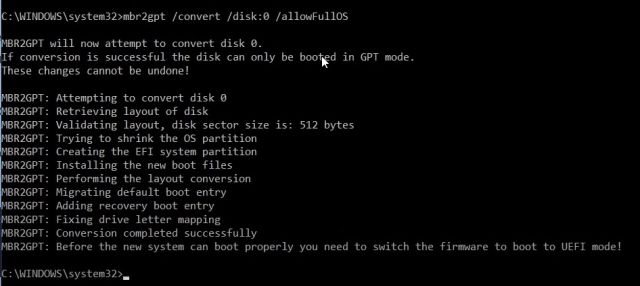
Next, paste the below command, and it will convert your Windows 10 PC from MBR to GPT disk without any data loss. Repeating again, make sure to change the disk number if you are doing this process for a different disk number. If you get a success message, well, congratulations. You have successfully converted MBR to GPT partition style and without any data loss. But wait, there is one more step to perform.
At the end, you will see a message saying, “Before the new system can boot properly, you need to switch the firmware to boot to UEFI mode!” So, restart your computer and boot into the BIOS, and change the firmware mode to UEFI. You can follow the steps detailed in the section above to change the “Legacy mode” to UEFI from BIOS. Keep in mind that your PC won’t boot unless you make this change.
Now, boot up your Windows 10 PC, and verify the partition style as we did above. Press the “Windows +X” shortcut and open “Disk Management”. Right-click on the desired disk -> Properties -> Volumes. Here, the “Partition style” should mention GPT. That’s it. You are done.
Convert MBR to GPT Disk on Windows 10 PCs Without Losing Data
So that is how you can convert the partition style from MBR to GPT without erasing any of your data on Windows 10. The best part about this method is that you don’t need to create any bootable stick. On a live Windows 10 PC, you can pull off this conversion with ease. Anyway, that is all from us. If you want to learn how to use Windows 10 Media Creation Tool or enable the new Eco mode on Windows 10, check out our linked articles right now. And if you face any issues, let us know in the comment section below.

